Showing posts with label engineered quartz. Show all posts

11.4.11

Engineered Quartz : Countertop Edges


It has been a common issue miter joint skirts and countertop edges, today I’m going to hopeful give you some  really interesting  ways to perfect, other types of countertop edges. As I have said times before in my prior posts, a hidden joint is synonymous to professional perfection.
The miter joint skirt works well on some countertops, although other need a wider underneath support for a correct fitting on the cabinet, and in some cases it requires a thick solid edge of 40mm or even 50 mm, that may need a inner width of 100 mm for stability reasons.
So basically in these cases, you will find several ways of doing it, although one of the easiest and following these steps will be near perfection, with little risk of damaging raw materials while working on the counter. We always have to look at the risk we put on the countertop, after all the raw material is quite expensive, and after we have the shade variations, so we have to keep a keen eye on every detail.
Things you will need to make a perfect union, is proper adhesive, it’s normally a bi-component similar to the ones used on your day to day work, although with some special additive due to the fact of being quartz, quartz has very low porosity, for a resin to do a proper and lasting chemical link a chemical additive is  used for this effect, anyone interested in this type of information feel free to e-mail me. So we have component 1 as a polyester resin based adhesive glue pigmented to the right color (as I mentioned on my prior post, it’s iron oxide pigment, anyone with some practice can do it easily). The component 2 is a hardening agent, is basically a PBO catalyst paste used to accelerate the hardening of the glue.
Regarding the use of glue, read the instructions carefully, and remember temperature affects the hardening speed, so keep adapting your adhesive glue according to the weather conditions.
As before you’ll need some useful tools and in this case a few rubber tipped clamps and a good worktable.
Clean thoroughly the areas to be glued, make sure they’re as calibrated as possible, the glue like before the thinner the better.After it starts hardening clean the surface of the excess glue.
Some people to avoid the problems the joint area causes, just bevel both ends and use this solution commonly, everyone easily notices that they have been glued together.
My suggestion which has improved greatly the final finish and quality of the joint, is after gluing the two pieces, do an extra pass on the head polishing machine, and you will see wonders happen, it literally hides the joint fairly well, however it is important that the glue mixture is made to a perfect color combination.
Looking at other improvements that can be made in most countertops, however I know very few of us really want the bother with it and cost to add this feature is never worth it, but I believe it’s really a great add on to the final client. It’s an anti-drip cut underneath the counter. If you spill a glass of water on top of your counter the most probable thing that will happen is that it’ll just drip down your beautiful wood cabinet. With this ant-drip cut, just as we normally do on wall coverings or windowsills, the water will drip directly onto the floor. In this case, avoiding humidity on your kitchen cabinets.
When it comes to countertops either in granite or engineered stone we have so many options, and so many possibilities, I just hope to contribute with useful information.

7.4.11

Engineered Quartz : Counter top miter joint edge

How to miter join two pieces of engineered quartz or granite.

If you are a do it yourself person or even a professional, I think this post will help you on your current projects either a do it yourself countertop edge made of granite or engineered quartz.
I’ve seen several techniques done, and many with really great results. Hiding the joint in a front skirt of a engineered quartz countertop is one of the major problems for all fabricators. I guess some skirts are easier to hide than others; however in this post we will actually focus on  the miter cut technique, but there are a few others which may also bring you very positive results. The main objective is to to hide the joint area making the end user believe that it’s a unified piece of engineered quartz or granite.
Before we go ahead with details, it’s important that you choose the appropriate gluing adhesive for the material you plan to glue. Adhesive for marble use is different than the one for engineered quartz, the porosity is different and may pose difficulties to the gluing chemical process. Just as an example doing a basin out of engineered stone can be a great disaster if you do not use the appropriate technique with the gluing process, the continuous humid, dry, heat, cold processes will gradually destroy the linkage between the several engineered stone pieces.
As I already mention we will be dealing directly with miter type joints, in my opinion one that requires perfect cutting accuracy but in the end will give you a fabulous result. I will try to the best of my knowledge explain the correct way to actually do a perfect job. 

What is a miter type joint?

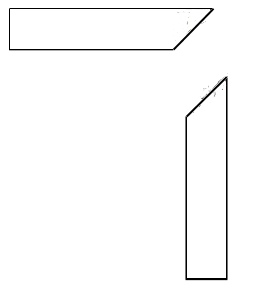
A miter joint is made up with a perfect 90º angle, by joining two separate pieces of engineered stone (or any other product for the general matter) with a 45º angle on each one. Gluing them together we will end up a perfect 90º angle piece of stone.


Gluing miter type joints

A miter type of joint are one of the easiest to actually hide the joint area. It’s main characteristic is to give your worktop a side view of a great thickness, since standard thicknesses for quartz slabs are between 1,2 and 3 cm, some like a 4cm view. However there are some important things you should be careful while preparing the pieces to cut and glue:
  • The longer the piece the more difficult it is to get a perfect job done, use auxiliary tools to help you with this tough job, scrapples and hooks will be needed to hold the pieces in place during the gluing process and a good worktable will also be essential.
  • Perfect cutting, the 45º cut on both ends will have to be perfect as they’ll have to be joined together to make a perfect 90º angle.
  • The adhesive glue, should not be too thick as it’s thickness will also increase the joint area and therefore make it difficult to hide, so make a relatively liquid paste for this type of gluing.
  • Make sure you adapt the color of your paste to the color of the stone, use iron oxide pigments for the job, make certain the color is well balanced . Some manufacturers will sell you putty or professional glue already mixed to the right color, with some experience in mixing colors you may easily dominate this and be independent. (in my example it's yellow)

Now the trick that will definitely hide the joint is the beveling of the edge, beveling the joint corner will disguise everything and make your job perfect. So a do it yourself granite or engineered quartz countertop may end up looking very professional, all you need is to follow some simple steps and precision cutting to ensure a really great countertop edge.


29.3.11

Engineered Quartz : Material Safety Data Sheet ( MSDS )


Engineered quartz like most products and substances should be accompanied by a material safety data sheet, or MSDS. This document is objectively to help both workers and eventual emergency personnel, in any emergency procedure caused by handling or working the engineered quartz. As we will see, these documents may include a variety of information regarding the product itself, in some cases due to the physical characteristics of the product some may not be applied. The MSDS information sheet should include information about the product, health effects, first aid procedures, storage and handling, protective equipment, besides other important information in dealing with the product in extreme abnormal situations.

The MSDS document is really a pro-forma which should contain important information regarding the product which may include the following information:
  • 1.       Identify the substance or product correctly
  • 2.       The name of the manufacturer, including complete address and phone contacts
  • 3.       Identify the composition of the product or substance, especially if any is hazardous. In engineered quartz slabs it should mention quartz and it’s chemical designation SiO2. And may include other substances that are hazardous if any. In many cases, only quartz will be mentioned
  • 4.       The Hazard Notification should be expressly mentioned: in the case of engineered quartz it’s not considered hazardous according to the NOHSC criteria
  • 5.       First Aid Measures: A long list of first aid measures will be written out namely in case of:
a.       Inhalation: may be necessary first aid if inhalation is during a cutting process with inappropriate water dust extraction systems. The person should be transferred to a open area, certified that all airways are clear and oxygen mask may be used if the victim suffers from breathing difficulty. Specialized medical attention is required.

b.      Ingestion: if dust is ingested, seek medical attention if symptoms develop
c.       Skin contact: after cutting wash off with soap and water, if any symptoms occur seek medical attention
d.      Eye contact: was dust with clean water, if symptoms develop seek medical attention
  • 6.       Fire Fighting Issues
Extinguishing: powder type extinguishers, in general the material is very hardly flammable
Special Exposure risks: not explosive, however at 490ºC or higher the product will auto ignite. However the quartz composition in the agglomerate stone will extinguish the flame, so the product will disintegrate giving out a smoke effect.
Protective equipment: standard equipment
  • 7.       Accidental release measures
If a large quantity of dust is released for some non predicted reason, and if such spill may contaminate water ways, local environmental authorities should be evolved to minimize impacts. In house dust release requires appropriate mask protection to sustain the origin and stabilize the area.
  • 8.       Handling and Storage
Due to the dimensions and weight involved personnel should follow all safety instruction while handling engineered quartz slabs.
Safety boots and gloves are obligatory, and all storage safety measure should be complied accordingly.
Namely avoid staking pallets and don’t stack more than 28 slabs on the same A-frame. It’s also advisable to avoid exterior warehousing of these types of materials, the damage caused by heat and weathering may cause permanent damage to the product.

These are some of the information that may be included in material safety data sheets, it depends on the manufacturers and the clients needs for such information. Many of the information included in these documents can be seen on fabricators manuals and other technical information documents that the manufacturer usually distributes to clients and other market agents.
Engineered quartz have serious issues regarding manufacturing, these I will focuss on a post dedicated to that specific matter, the material safety data sheet is a document that normally follows with shipping documents. Each manufacturer includes more or less information according to what they establish as important an useful, in general most products, engineered quartz, made using the same type of technology, and with similar raw-material base, will in theory have similar material safety sheet data.


22.3.11

NSF Certified Engineered Quartz


The majority of the engineered quartz manufacturers have applied for NSF certification, so why is this important? NSF stands for National Sanitation Foundation, a non profit organization which helps certify and create standards for food, water and other consumer goods. It’s an independent organization with a commitment to provide education and research in the public health and safety fields.
Due to the fact that most engineered quartz applications are directly for kitchen countertop use, it has been of the utmost importance to certify it regarding  consumer health and safety. So we have seen gradually every engineered quartz producer certifying their products with NSF certification.
NSF certification is physically noticed through a mark, due to the large range of products that may be certified its very common to find it in many, consumer, industrial and commercial products. So many products are subject to this certification, from bottled water, appliances, plumbing to kitchen countertops. The NSF certification mark is an assurance that the product has been tested by an independent entity, that certifies it as a safe product to use which regards to your family health and safety.
On their website you may confirm the product tested, I ran a search for Silestone products and it returned a full list of colours that have been tested by NSF. So the product itself was certified as a solid surface for food zone use and the standard applied was the NSF/ANSI Standard 051 –Food Equipment Materials. The results also specify that all food contact types were tested and the maximum temperature in use is F 300º. It is also added that this product can be used with a leather finish, and is intended to be used as a table or countertop, and is not intended for food conservation.
So basically the NSF certification defines the type of use a product may have when in contact with food in this case, which assures the end user that the product is safe and healthy for the approved application.
So if you are buying a kitchen countertop, the NSF certification may be an important thing to view, being that most manufacturers do have it, I believe that some products with shadier origins may have difficulty in attaining such a certification.

18.2.11

Quality in Engineered Stone

Engineered stone like every other product has quality standards, although at the current moment the CE marking is not ready for engineered stone slabs. On this post I want to show you, common industrial problems with engineered stone, you will see things that should not arrive at your warehouse, let alone in someone's household.
Engineered stone being a man made stone or as some like to call it an artificial stone, it's rather complex to make a perfect piece of engineered stone, many little things may go wrong during production, warehousing and shipping.
Here is a list of the most common problems that may be visable on your engineered stone slab or tile:
  1. White superficial dust/veins: this superficial white dust is due to bad formulation or uneven distribution of the mixture, what happened was that the mixture was not done correctly, being that in the mixture some dry unmixed quartz dust was incorporated into the slab. In the photo you will see a vein effect, after the dust is cleaned the tile will not have a perfect surface.
  2. Cracking: you may receive pieces or even slabs with small tiny crack that you can barely see. These are due to an improper chemical reaction, normally the hardening process of resin is a very controlled chemical process, but many factors can either accelerate or slow down the reaction.
  3. Tiny pin holes: Unfortunately the photos I have can't give you a correct idea of this, as the definition is not as good as I need to actually show you it. But basically it characterized by small pin holes on the slab surface, it's really difficult to see, and sometimes you may need the right lighting angle to correctly visualize it. These little pin holes with time will accumulate dirt, and the engineered stone will quickly look very awful, although in dark colours this negative may be hidden. In theory a slab by slab production process should be less porous than a block production process, so if you deal with engineered marble it may be a good thing to look out for. Some manufacturers end up resining the surface to hide this defect, but many times the defect is so small that even resin will have problems solving it.
  4. Shade differences in the same slab: I had once a project where I learned a very painful lesson, we cut the counters from the same slab (dark blue with mirror chips), and so we did not worry about checking the shade, as we all did assume that the same slab would have an even mixture. Truth is that polishing also has an important effect on the surfaces shade. Applying those miraculous chemical products will improve the shade difference, but will not solve it.

  5. Slab length: I've learned through experience not to believe in everything people tell me, so I usually do a visual inspection of my cargo, a handy measuring tape is essential, and don't be surprised if you find what I found (in the photo you may see that the slab has 303 cm, and I was paying 307).
  6. Warped slabs: engineered quartz slabs is far from being plastic, as it has more than 90% natural stone, as everyone knows most materials warp if they are not warehoused properly. And engineered stone may warp slightly more than your common natural stones. So make sure to properly warehouse you engineered stone slab and tile.
  7. Slab thickness: as I mentioned the length, the thickness may be a more common defect, everyone who has done some engineered quartz countertops, know that an uneven thickness in the same slab or between slabs, will cause adjustment problems. To actually measure the thickness of a slab, besides the measuring equipment, you also need to take the measurement of the slab in several points, 6 are just enough to conclude if the thickness is according to your tolerances.
  8. Tile mitre is a common problem, a quick check can be made by facing two polished surfaces and trying to even out the sides, just by putting the tiles standing on a flat surface you will quickly figure out if the tiles are well cut. Avoid these problems before they get to difficult to handle, these types of controls are in some factories made automatically by machinery, but many factories use sampling methods to do such test. 
  9. Engineered stone tile cut imperfection: equipment and tooling age rather quickly, if you have automatic cutting lines you may have several tiles to handle per minute, which in some factories may leave quality inspection to the side to deal with the current problem.
  10. Engineered stone tile uneven bevelling: the correct way to bevel a tile and to guarantee a perfect bevel, is bevelling it with the polishes surface facing down. However most factories do bevel it with the polished surface facing up, which means any little deviation in thickness will be an imperfection in bevelling. It can be a possible problem in some cases where quality control is not taken seriously. 
  11. Grey smudges: these occur more frequently in engineered marble than in engineered quartz, and is mainly due to the production process.
  12. Surface scratches: you find several types of surface scratches, some due to bad packing others due to manufacturing. One thing for certain, it's easier to find scratched material on engineered marble, than engineered quartz, the hardness of marble is relatively low and can be scratched by many materials. Regarding packaging engineered marble and engineered quartz should be done with the polished surface facing each other. When dealing with engineered marble tiles, especially on long voyages, if their is not protection in between polished surface, micro scratches might appear on the end of the tiles. Packing has to be very well done to avoid these situations, the trepidation during transportation will gradually make friction between the tiles and any micro dust will become an abrasive. The other often situation, and common to engineered marble and engineered quartz are micro scratches on the polished surface, namely in dark colours. Very frequently small particles of sand/dust appear during the polishing process (in saturated water for example) and they create defects on the surface, which sometimes may not be effectiently detected by visual inspection.

      4.2.11

      Engineered Quartz : A Guided Tour

      Visiting an engineered quartz plant, will help you understand some particular things that relate to the product. Not so long ago I posted a guided tour of an engineered marble (cultured marble) plant, today I will guide you through a engineered quartz slab plant, what I have described in these two posts are in general the way things still work today, many brand names which you may know use similar methods.
      So we'll start off with raw material ... engineered quartz and engineered marble have more or less the same type of composition, although, engineered marble normally is made from natural stone with less that 4 Mohs hardness. Engineered quartz technology is based on a slab production plant, which avoids the stressful sawing. Just to add, that you can make engineered quartz using the marble block technology (in theory) although you'd have several problems afterwards, mainly regarding to sawing and polishing. You'd need to use granite cutting and polishing technology to actually have any positive results. So to make really hard materials like quartz slabs, it's has been made in a slab by slab processing units.

      The guided tour through a engineered quartz plant starts here:
      • Raw materials: the components necessary to make an engineered quartz slab are quartz grit (which may vary in size, it basically defines the texture of the final product), quartz dust (main filler component), unsaturated polyester resin and coloring pigments.


      • Raw material feeding system: the feeding system is divided into several types, as the polyester resin is used in a liquid state, all other materials are either dust or chips. So you may have screw conveyors for the dust and normal conveyor belt systems for the grit. The pigments are used in such small doses that it has a separate feeding system for them.
      • Making the engineered quartz slab - Mixing: the first phase in the slab production line is the mixing of the components. A engineered quartz slab production line may have 2 to 3 mixers in some cases even more. The multiple mixers are used due to two reasons: to maintain and guarantee production flow, while one is discharging the content to the slab moulds the other one will be loading another batch; the second reason is to do special effects on the slab texture, namely bi-colours and tri-colours, the mixtures  (2or 3 colours can be used) are mixed separately in specific vertical mixers, before going into the mould they are slightly mixed in one final vertical mixer, the final effect on the slab is a unique texture filled with colour nuances.
      • Filling the moulds with the mixture: In the photo position D is the transport conveyor that brings the mixture from the mixer to the mould filling unit. At point E the mould is filled with the mixture, due to the gas emitted by resin in the composition of the engineered quartz slab the whole mould filling sector is protected. The mixture is evenly spread on the mould.
      • Vacuum & Vibro Compressing Unit: at point A we have a small vacuum chamber and a vibro compressing unit. This is the main secret of engineered stone, this procedure is of the utmost importance in the production of high quality engineered stone.

      •  Staging Hub: at point B, we will find a staging hub. The chemical reaction has started before the mould filling so by the time it reaches the staging hub, although it is still not solid., it has hardened significantly The staging hub is a giant oven where the slabs accelerate and stabilize the curing. These staging hub are one of the greatest limitations to a production plant so the bigger the better, you'll have several slabs in this position, constantly one going in and one coming out on the other end.
      •  Slab and mould separating unit (F): at this point the slab just left the staging hub, it's very warm, a little too warm to put your hand on. It's time to separate the slab from the mould. In the photo underneath you may see the moulds G, which are separate from the engineered quartz slab (H).
      •  Mould cleaning line (C): I guess by now, most of you have questioned about C, as it has appeared on the last few photos. Well C is the mould cleaning line, the first models of engineered quartz production lines used paper base moulds, which would only be used once in most cases, the waste was too much, associated with the waste treatment cost and the cost of the paper moulds, not very long after appeared the first rubber mould cleaning line. A recycling line with a water treatment plant for the waste.
      • Slab calibrating and polishing: The final phase: the slab surface finishing unit. One particular thing about the quartz slab, it's calibrated on both surfaces, before it gets polished. So the finishing line starts off with a JOT robot loading the slab, followed by a first calibration of the non finished side. Then comes one of the coolest devices I have seen, it's an inline flipping unit for slabs. After this stage the rest of the line is very similar to granite surface finishing line, with the required inspection at the end.